Step-by-Step Walkthrough
1. Log in to the Amazon AWS Console
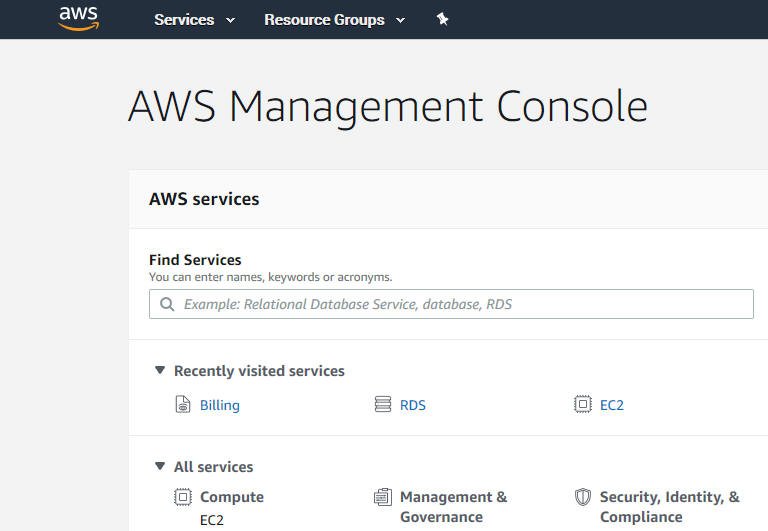
Fire up your browser and navigate to Amazon AWS, then log into your Amazon AWS RDS console.
2. Open the RDS Section
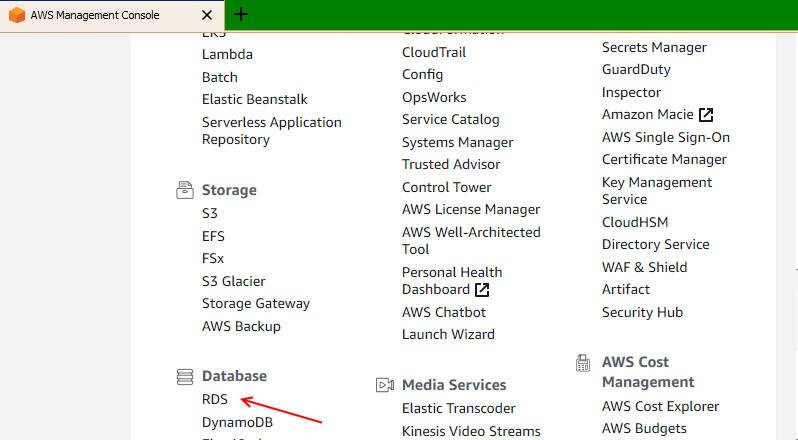
Scroll down and click on RDS in the "Database" section.
3. Open DB Instances
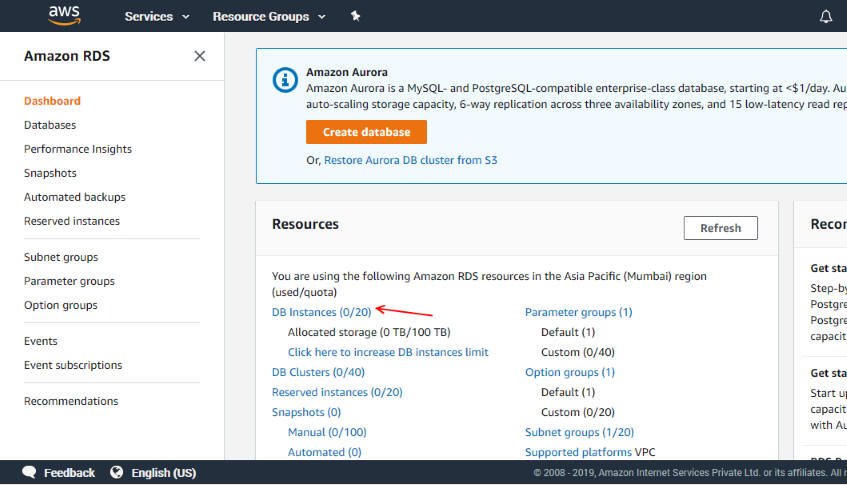
You'll reach the following screen. Click on DB Instances as shown below.
4. Create a Database
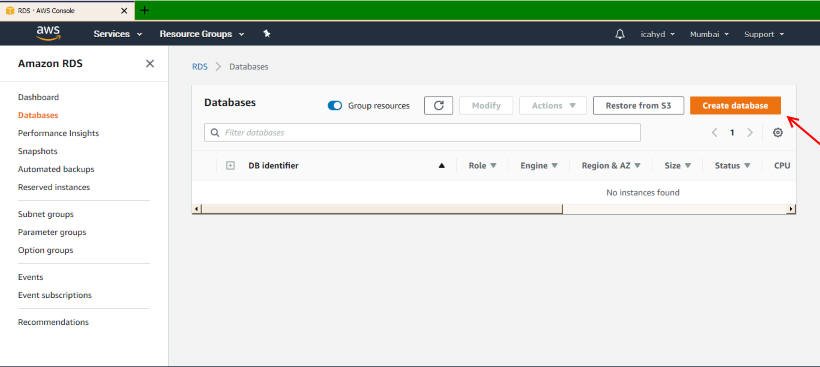
On the next screen, click the Create Database button in the top-right.
5. Choose the Database Engine
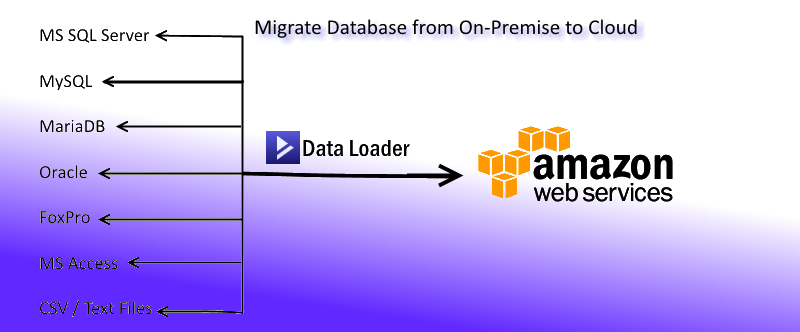
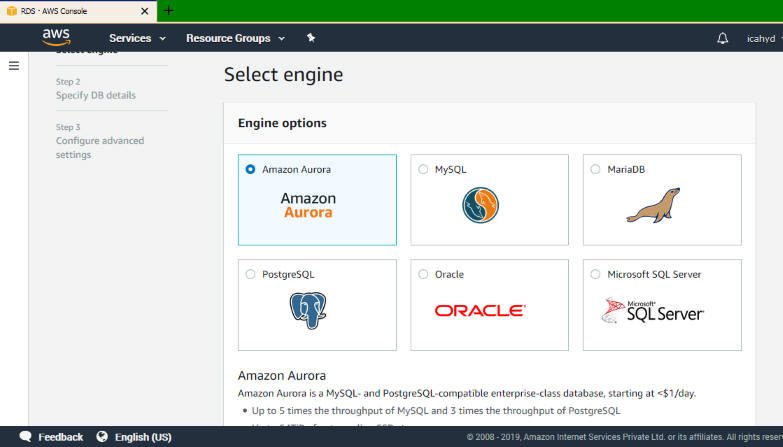
Amazon AWS RDS will prompt you to choose a database engine: Amazon Aurora, MySQL, MariaDB, Oracle, MS SQL Server, or PostgreSQL. Since we want MySQL, select MySQL and click Next.
6. Enable the Free Tier (Optional)
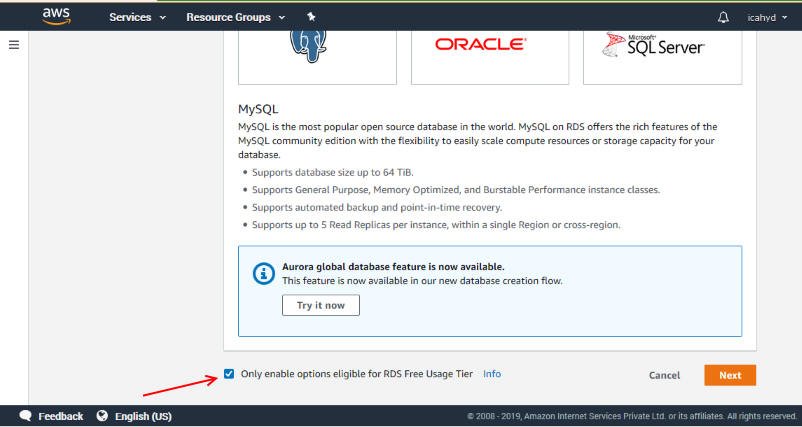
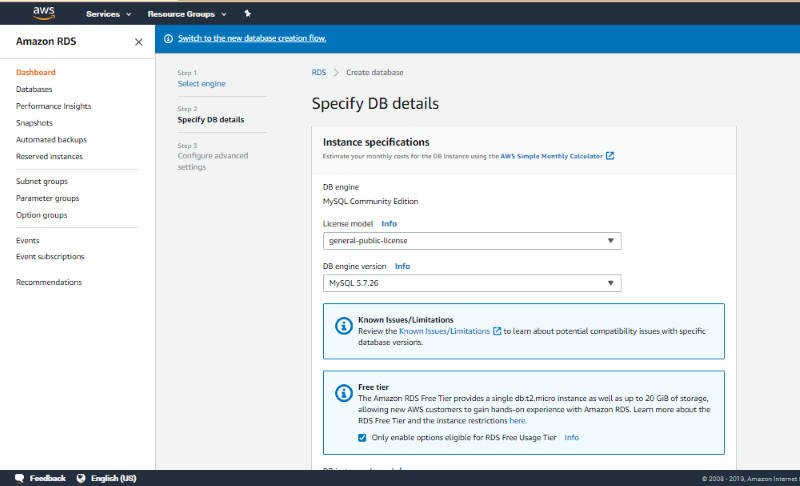
You can check "Only enable options eligible for RDS Free Usage Tier" if you're using the free trial — this helps prevent unnecessary billing while you get acquainted with the managed database service.
7. Configure Database Settings
After clicking Next, you'll be prompted for several database settings. If Free Tier was selected, only Free Tier-eligible options are shown. Accept the defaults for MySQL license, MySQL version, DB instance class, and allocated storage type.
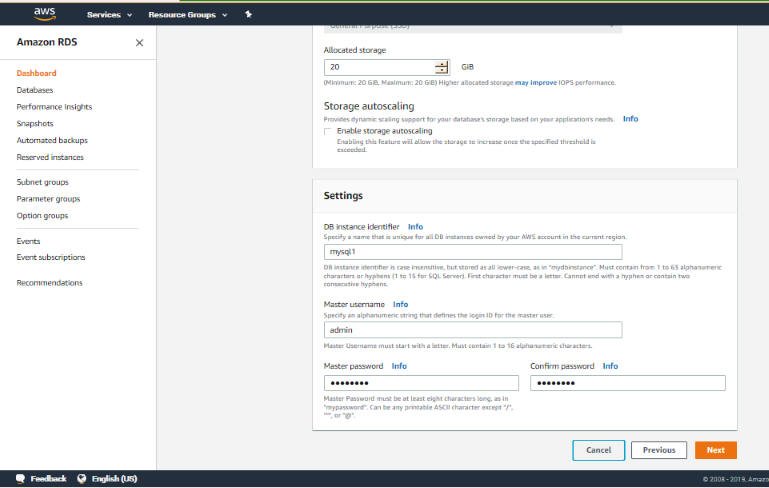
8. Set Instance Identifier, Username & Password
You just need to enter the DB Instance Identifier, Master Username, and Master Password. Remember these — you'll need them later to connect to this MySQL instance. Then click Next.
9. Configure Advanced Settings
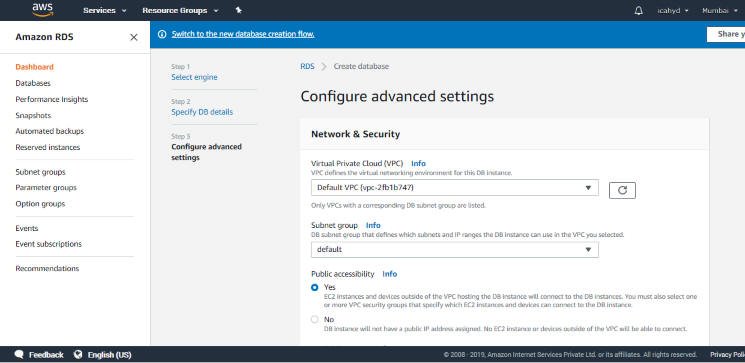
Clicking Next brings up the "Configure advanced settings" page. Accept all the default values.
10. Name the New Database
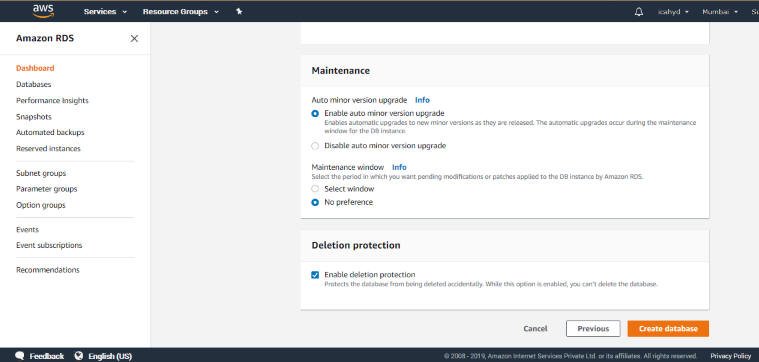
Scroll down and enter the name of the new MySQL database you want to create — we chose "db1", but you can choose whatever you like — then click "Create Database".
11. Wait for Creation to Complete
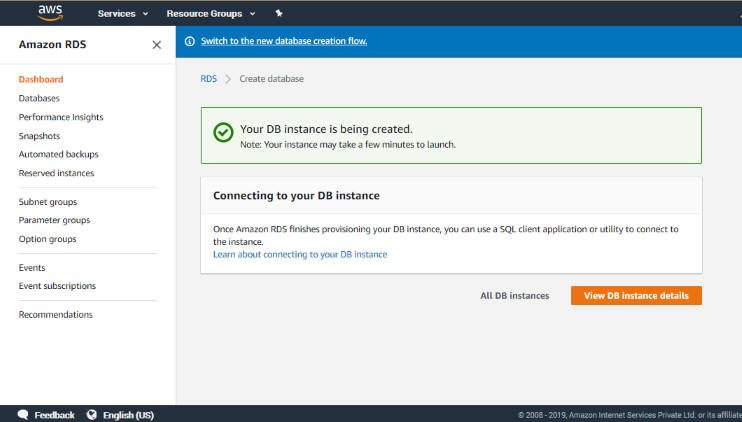
After clicking Create Database, you'll see a status screen while Amazon creates the new database instance.
12. Find Your New MySQL Instance
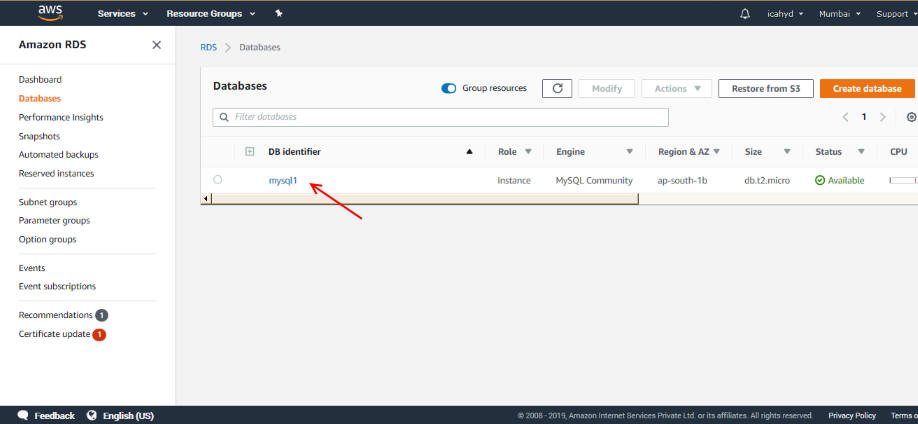
After a while, click RDS → DB Instances in the AWS console and you'll find the new MySQL instance listed.
13. Get the Connection Endpoint
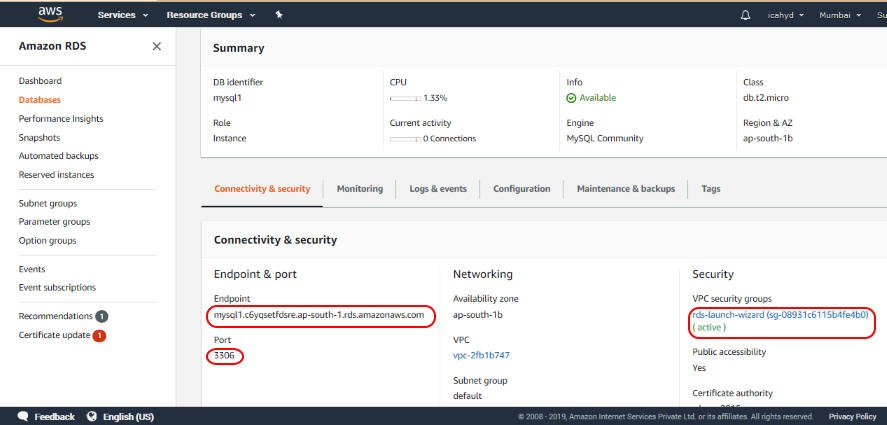
Click on the instance name to view its connection details. Here you'll find the Endpoint, Port, and Security Group — the Endpoint is the host address you'll use in Data Loader, and the default port is 3306.
14. Edit the Inbound Security Rule
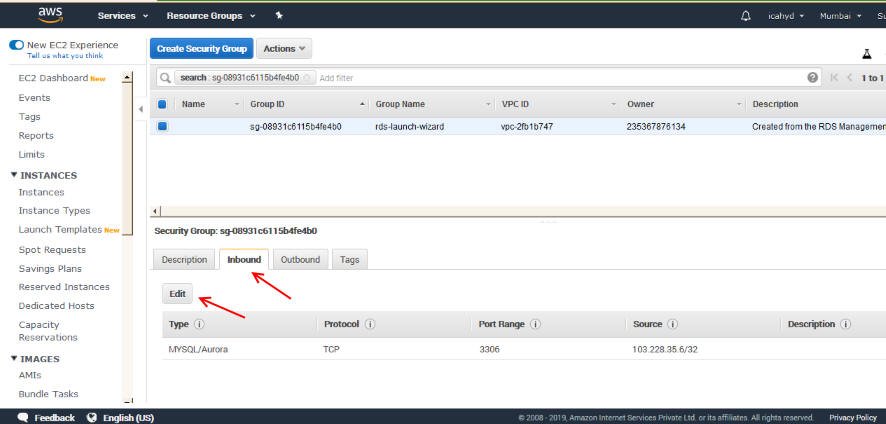
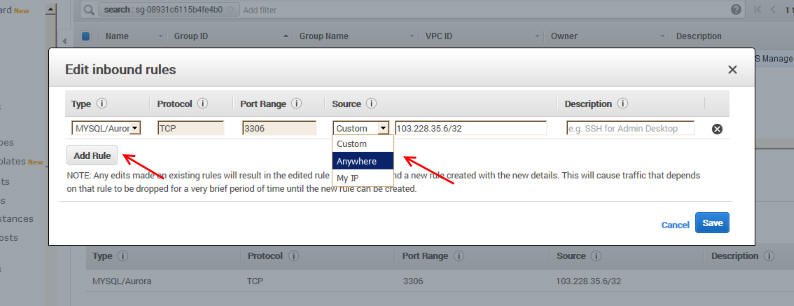
By default, AWS only allows connections from your own IP address. To allow other IPs, click Security, then the Inbound tab, then Edit.
15. Allow Access From Anywhere
Edit the existing rule to allow connections from anywhere, then click Save. Your MySQL instance on Amazon Cloud is now ready to receive data.
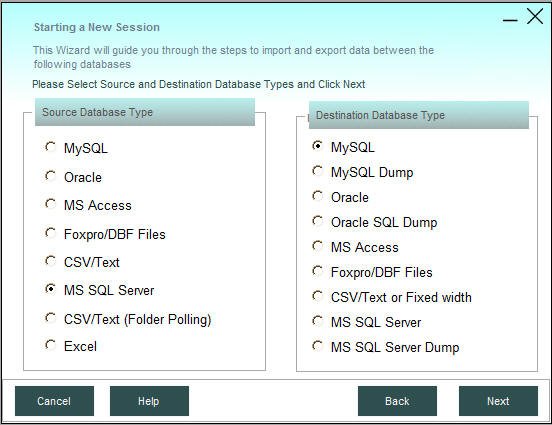
16. Start Data Loader and Select MSSQL as Source
With MySQL installed on the cloud, start Data Loader and select MS SQL Server as the source and MySQL as the target.
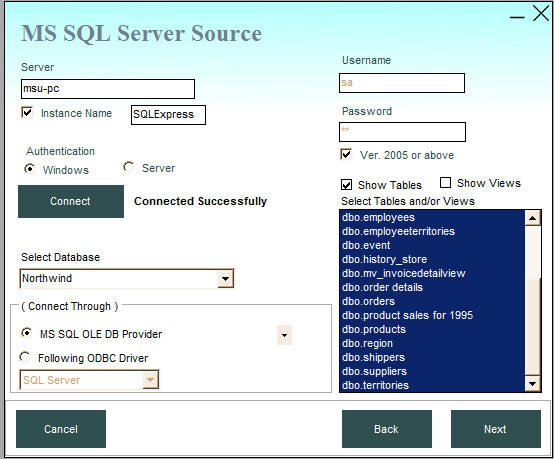
17. Connect & Select Tables
Click Next; Data Loader will prompt you to connect to your MS SQL Server database — enter the hostname, username, and password, then click Connect. Once connected, select the desired database, then select the tables you want to migrate (here, all tables in the Northwind database).
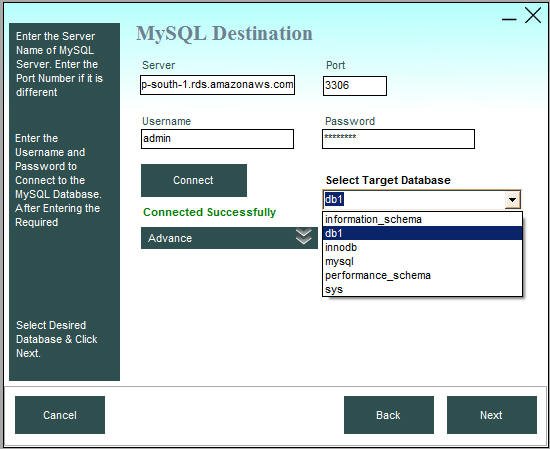
18. Connect to the Target MySQL Database
Click Next and Data Loader will prompt you to connect to the target MySQL database. Enter the Endpoint noted earlier as the hostname, along with the Master Username and Password, then click Connect and select the "db1" database.
19. Review Source and Target Tables
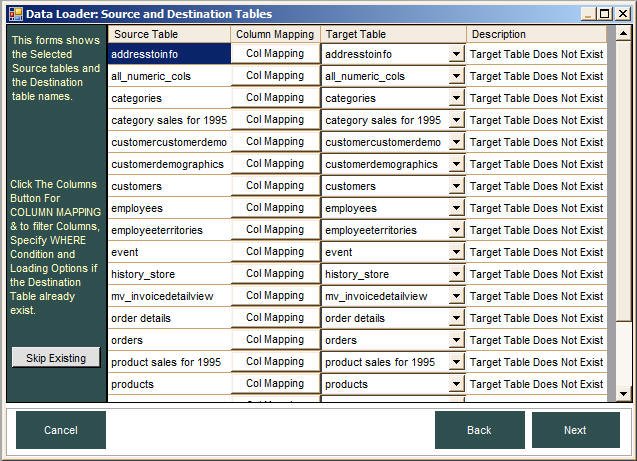
Data Loader shows the "Source and Destination Tables" screen where you can configure loading options via "Col Mapping" for each table — this is optional, so you can just click Next.
20. Save the Session
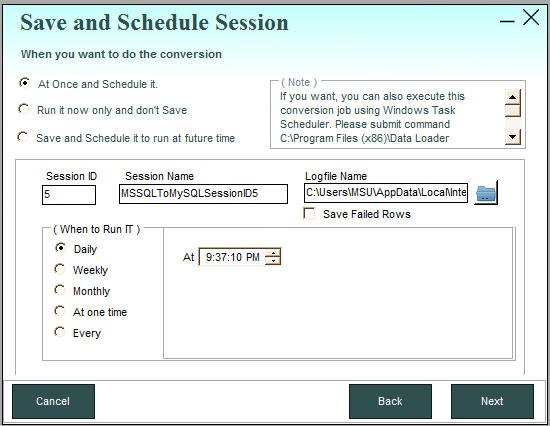
On the next screen, save the session and optionally specify an interval for scheduling. For this demo, just accept the defaults and click Next.
21. Start the Transfer
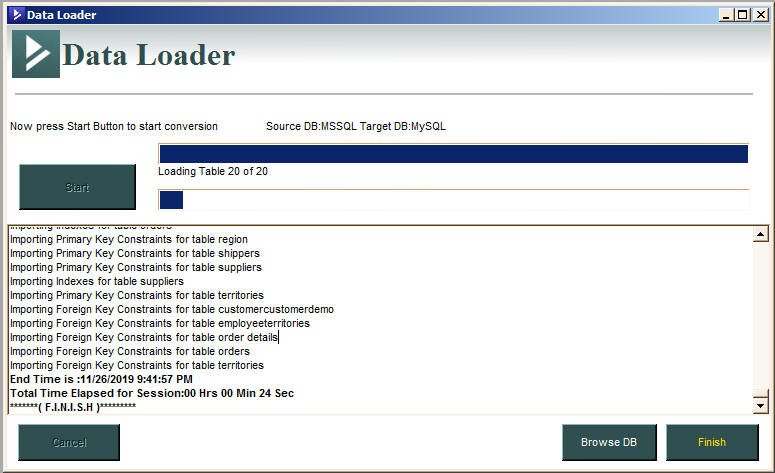
In the final screen, just press Start to begin the transfer. That's it!