Step 1: Launch SQL Server Management Studio
Open SQL Server Management Studio and connect to the SQL Server instance where your database is located.
Step 2: Connect to the Database
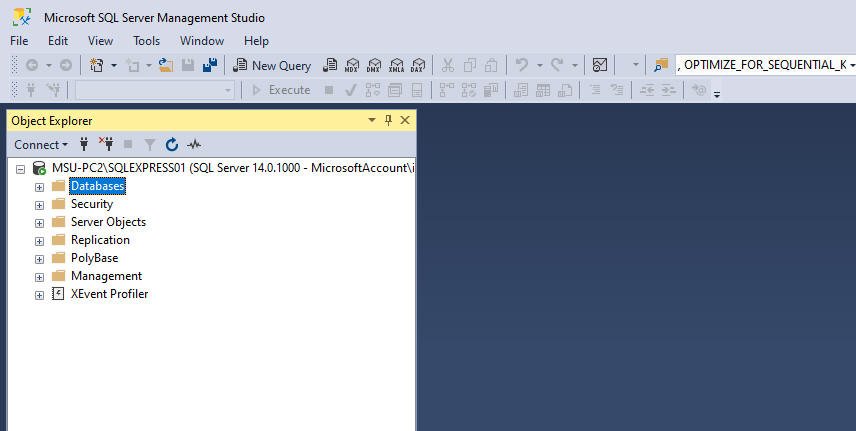
Expand the "Databases" folder in the Object Explorer window and select the database from which you want to export data.
Step 3: Open the Export Wizard
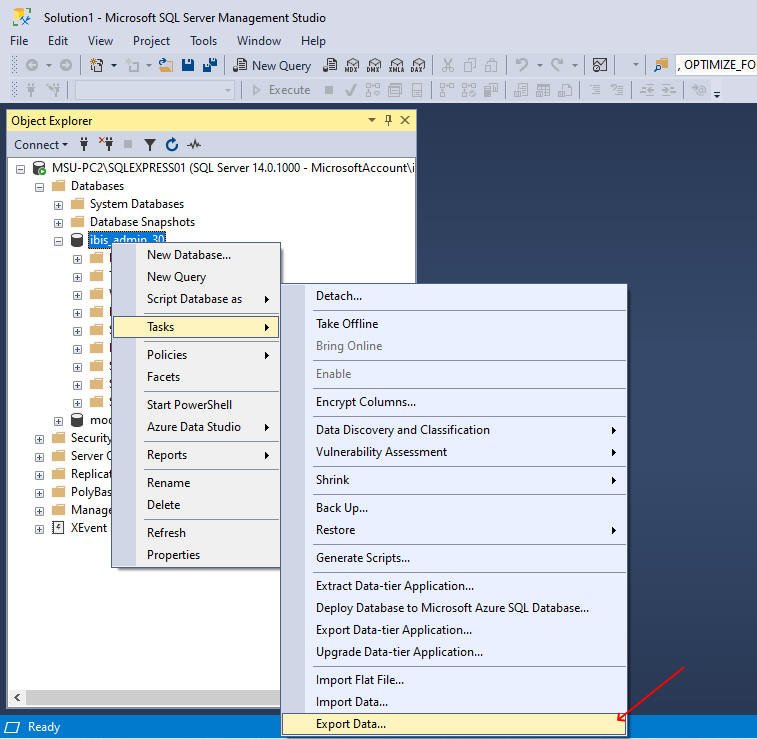
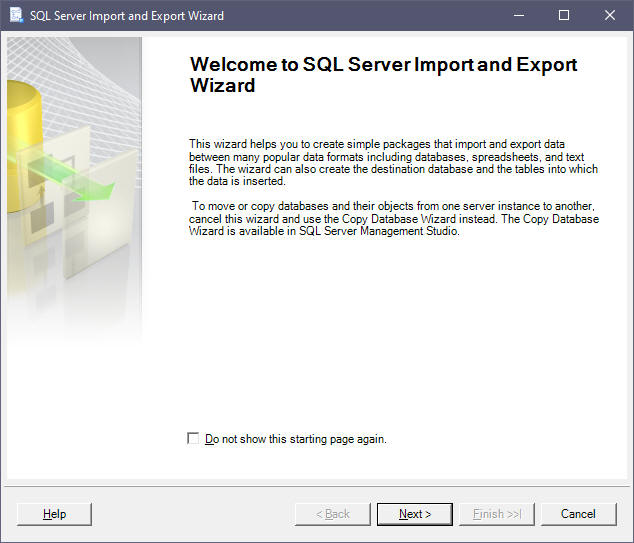
Right-click on the selected database and choose "Tasks" > "Export Data..." from the context menu. This opens the SQL Server Import and Export Wizard.
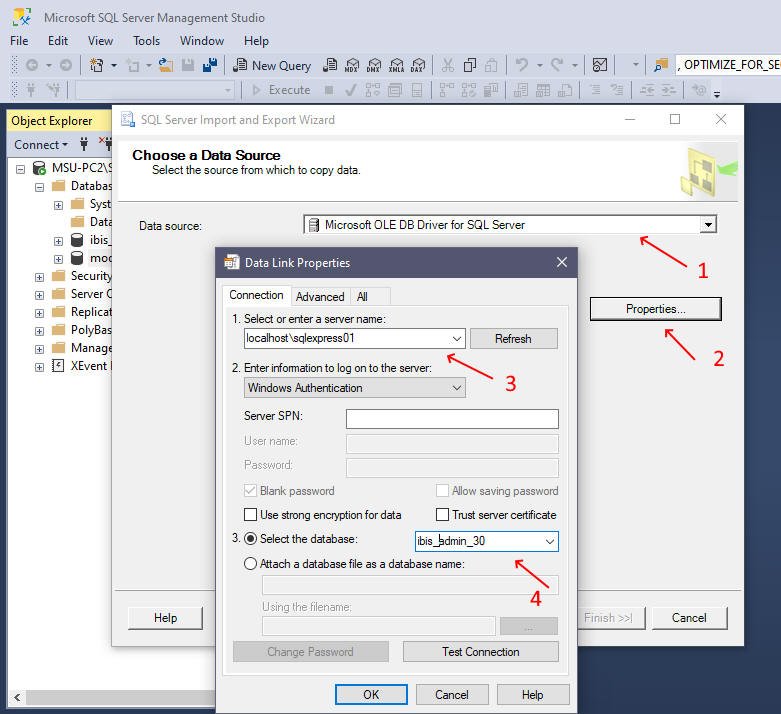
Step 4: Select the Data Source
In the SQL Server Import and Export Wizard, choose the appropriate data source. Select the SQL Server instance and authentication method that corresponds to your environment, then click Next to proceed.
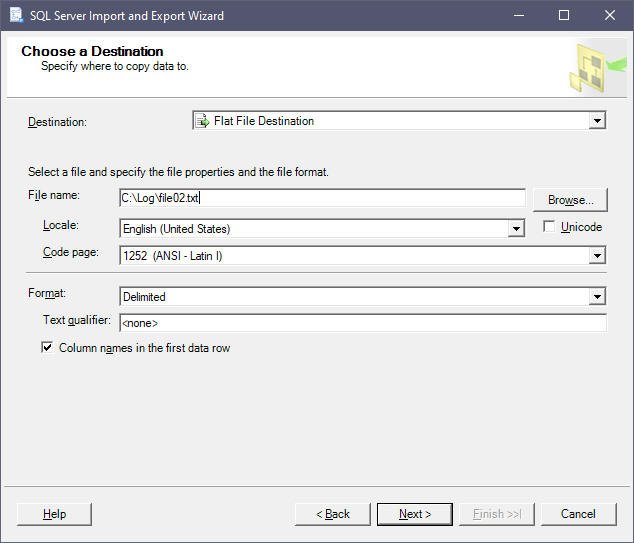
Step 5: Choose the Destination
Select the destination for your exported data. You can choose options such as "SQL Server Native Client" or "Flat File Destination" based on your requirements, then click Next to continue.
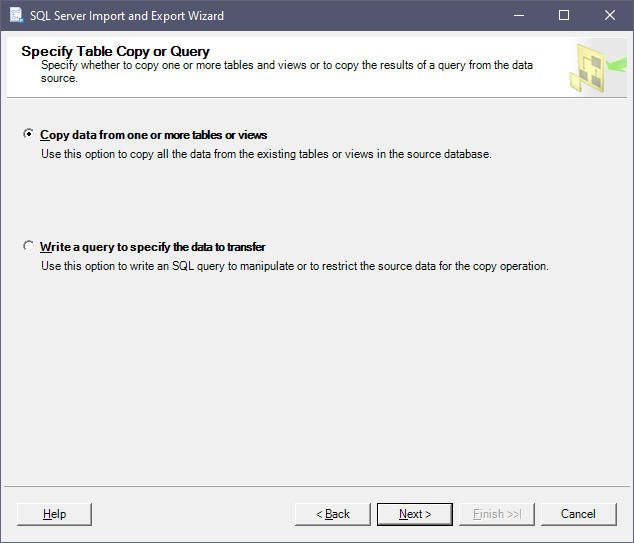
Step 6: Specify the Tables or Views
Select the tables or views you want to export data from. You can choose individual tables or entire schemas, or write custom SQL queries to retrieve the data. Click Next to proceed.
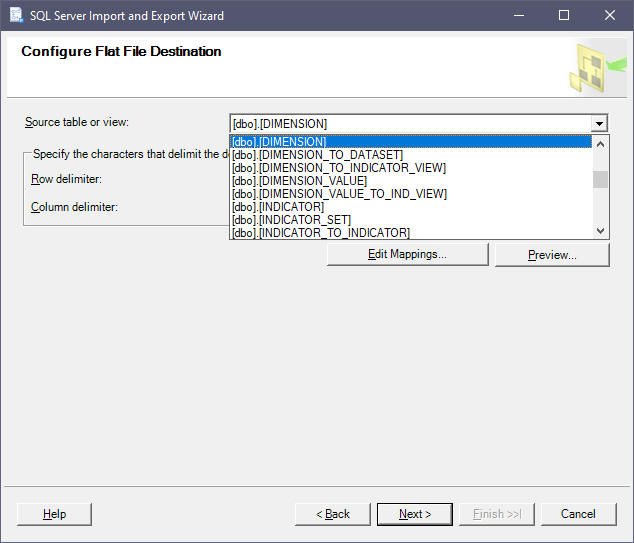
Step 7: Select the Source Table
Select the source table from the drop-down list and click Next.
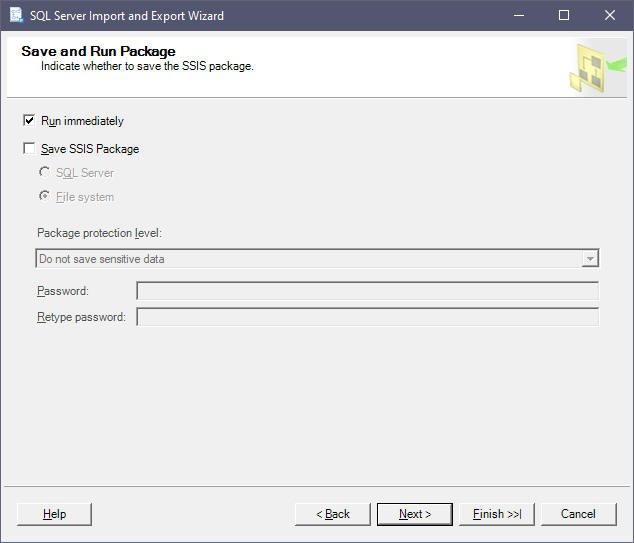
Step 8: Save and Execute the Package
Select whether to execute the package immediately, or save the package to run it later. Specify the package name and save location, review the summary of the export operation, and click "Finish" to save the package.
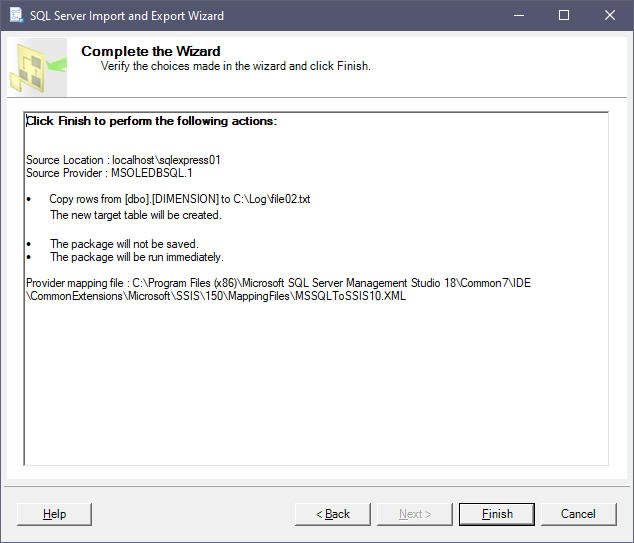
Step 9: Review and Start
Review the choices you've made in the previous screens and click Back if you wish to make any changes. If everything looks correct, click the Finish button to start the export process.
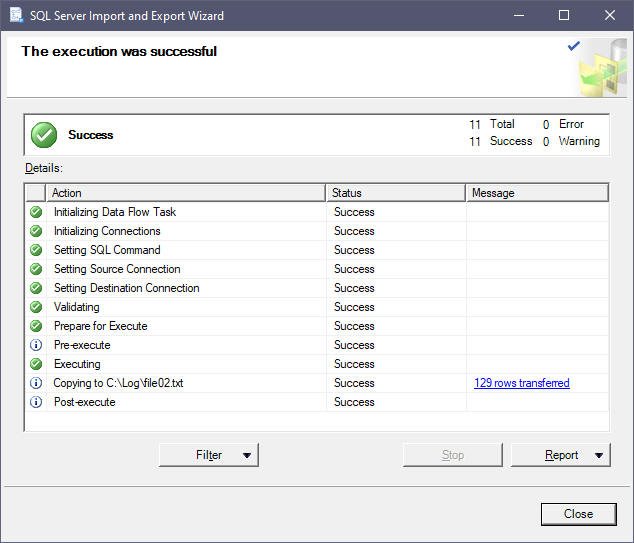
Step 10: Monitor the Export Process
The SQL Server Import and Export Wizard executes the export operation and displays progress. You can monitor the process in real time and view any error messages or warnings that occur.
Step 11: Verify the Exported Data
Once the export process is complete, verify the exported data in the destination database. Query the tables or views to ensure the data was transferred successfully.
That's it! You have successfully exported data from MSSQL using SQL Server Management Studio. Remember to review the exported data in the destination database to confirm its accuracy and completeness.