2. SQL Developer
Since Oracle 10g, Oracle has supplied a robust GUI tool called SQL Developer, providing a graphical interface for common database tasks such as creating and modifying SQL and PL/SQL statements like triggers, procedures, and packages.
It also supports database export, although not directly — it generates SQL statements in a dump file which you can then modify and run against your target database. SQL Developer is also Oracle's main tool for moving third-party databases (Access, SQL Server, Sybase ASE, DB2, Teradata) into Oracle Database via a wizard-driven process.
To convert a database from Oracle to MySQL using SQL Developer, follow three steps:
- Generate a SQL file containing DDL and DML statements using SQL Developer.
- Edit the SQL file in a text editor to match the target database syntax.
- Run the modified SQL file in the target database.
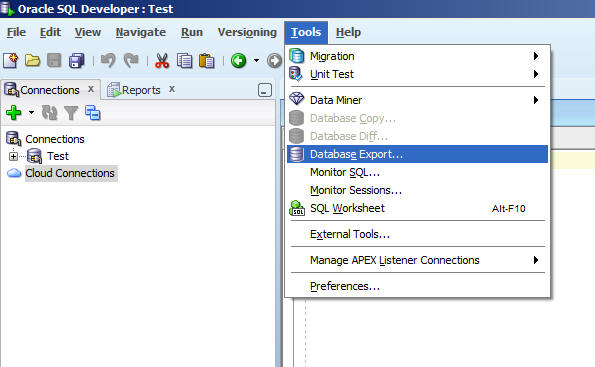
Let's walk through an example, migrating the HR schema from Oracle to MySQL. First, connect to the HR user in SQL Developer and choose Tools > Database Export.
Next you'll see the export options screen:
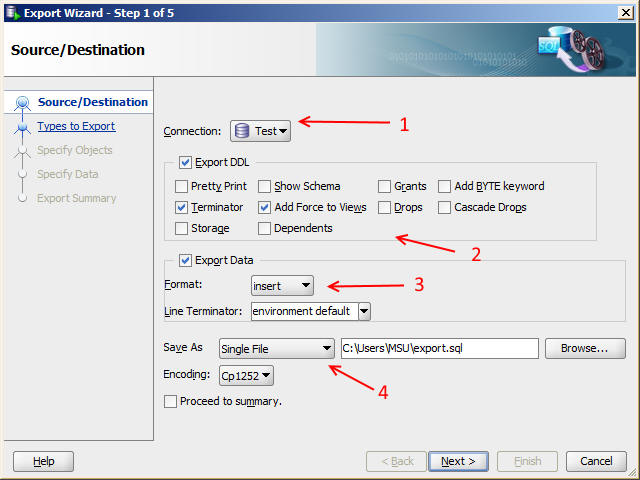
Choose your Oracle connection, deselect all options except those shown, choose Insert, choose a single output file, then click Next. SQL Developer will then prompt you to select which object types to export — since we're targeting MySQL, check Tables, Views, Indexes, and Constraints.
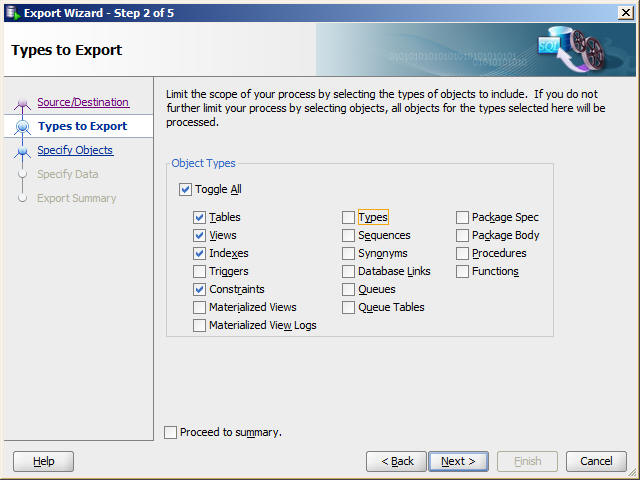
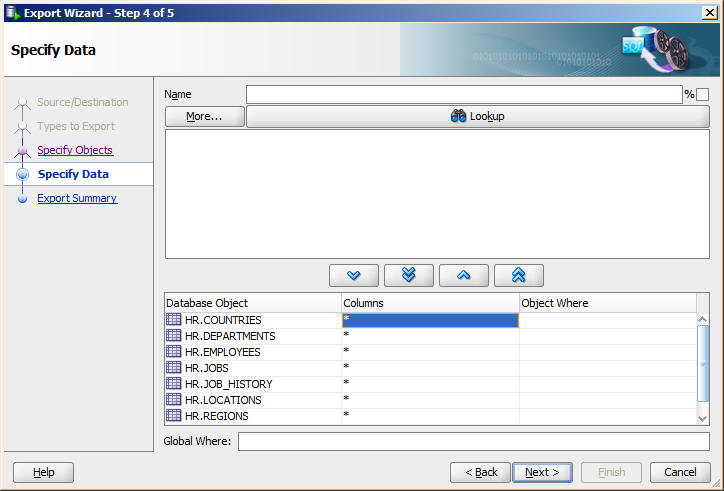
SQL Developer then shows the list of tables, views, indexes, and constraints. Select all objects and click Next — you can also choose which columns to migrate and optionally specify WHERE conditions to filter rows.
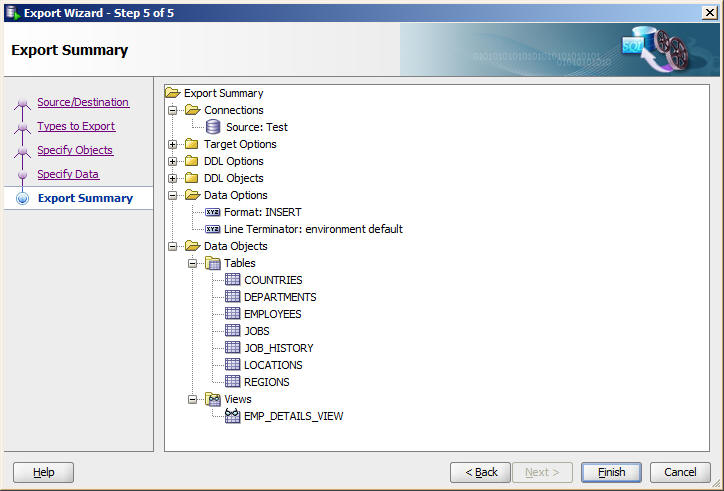
On the final step, SQL Developer shows a summary of the export session.
Click Finish to start the export.
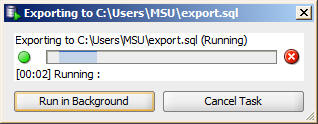
Once finished, SQL Developer displays the contents of the SQL dump file:
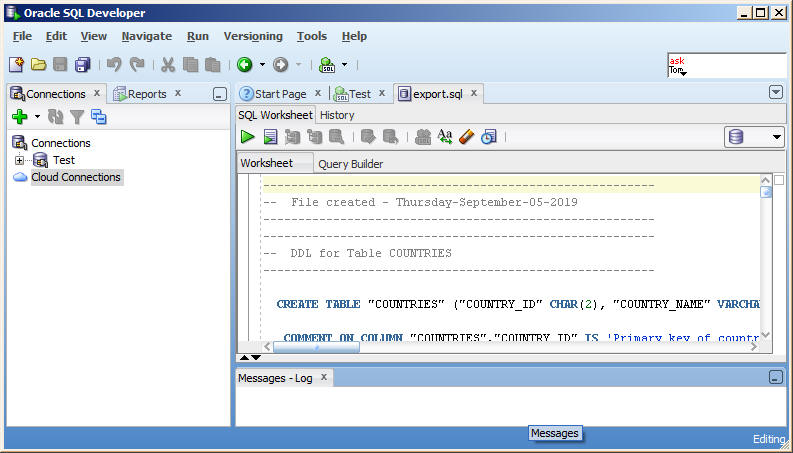
Here is an excerpt of the generated Oracle DDL file:
--------------------------------------------------------
--  File created - Thursday-September-05-2019
--------------------------------------------------------
--------------------------------------------------------
--  DDL for Table COUNTRIES
--------------------------------------------------------

  CREATE TABLE "COUNTRIES" ("COUNTRY_ID" CHAR(2), "COUNTRY_NAME" VARCHAR2(40), "REGION_ID" NUMBER,  CONSTRAINT "COUNTRY_C_ID_PK" PRIMARY KEY ("COUNTRY_ID") ENABLE) ORGANIZATION INDEX NOCOMPRESS ;

   COMMENT ON COLUMN "COUNTRIES"."COUNTRY_ID" IS 'Primary key of countries table.';
   COMMENT ON COLUMN "COUNTRIES"."COUNTRY_NAME" IS 'Country name';
   COMMENT ON COLUMN "COUNTRIES"."REGION_ID" IS 'Region ID for the country. Foreign key to region_id column in the departments table.';
   COMMENT ON TABLE "COUNTRIES"  IS 'country table. Contains 25 rows. References with locations table.';
/
--------------------------------------------------------
--  DDL for Table DEPARTMENTS
--------------------------------------------------------

  CREATE TABLE "DEPARTMENTS" ("DEPARTMENT_ID" NUMBER(4,0), "DEPARTMENT_NAME" VARCHAR2(30), "MANAGER_ID" NUMBER(6,0), "LOCATION_ID" NUMBER(4,0)) ;

   COMMENT ON COLUMN "DEPARTMENTS"."DEPARTMENT_ID" IS 'Primary key column of departments table.';
   COMMENT ON COLUMN "DEPARTMENTS"."DEPARTMENT_NAME" IS 'A not null column that shows name of a department. Administration,
... (truncated)
This SQL cannot be run directly in MySQL — the syntax needs several changes to become compatible:
- Data types need to change — Oracle's VARCHAR2 becomes VARCHAR, NUMBER becomes NUMERIC/DECIMAL, DATE becomes DATETIME, and so on. See our Oracle to MySQL datatype mapping guide.
- Replace double quotes (") with backticks (`).
- Remove COMMENT ON statements, since MySQL doesn't support defining comments separately — comments can only be defined within CREATE TABLE statements.
- Enclose comment lines starting with "--" within /* */ symbols.
- Remove INSERT statements on joined views, since MySQL supports insert/update through views but not views based on joined queries.
- Remove ENABLE keywords after constraint statements, as they're not supported in MySQL.
- Similarly remove the ORGANIZATION INDEX clause.
Alter constraint statements also need adjustment. For example, this Oracle statement:
ALTER TABLE "COUNTRIES" MODIFY ("COUNTRY_ID" CONSTRAINT "COUNTRY_ID_NN" NOT NULL ENABLE);
...becomes this in MySQL, with the constraint name removed and the column datatype/width added:
ALTER TABLE `DEPARTMENTS` MODIFY `DEPARTMENT_NAME` VARCHAR(30) NOT NULL;
Similarly, this:
ALTER TABLE `DEPARTMENTS` ADD CONSTRAINT `DEPT_ID_PK` PRIMARY KEY (`DEPARTMENT_ID`) USING INDEX ENABLE;
...becomes:
ALTER TABLE `DEPARTMENTS` ADD CONSTRAINT `DEPT_ID_PK` PRIMARY KEY (`DEPARTMENT_ID`);
Since this example uses TO_TIMESTAMP for inserting date values, we need to convert it to MySQL's STR_TO_DATE function:
to_timestamp('31-DEC-06', 'DD-MON-RR HH.MI.SSXFF AM')
...becomes:
STR_TO_DATE('17-FEB-04', '%d-%b-%y')
You can use any text editor to make these changes — HeidiSQL works well for this. Here's an excerpt of the modified file, ready to run in MySQL:
/*--------------------------------------------------------
--  File created - Thursday-September-05-2019
--------------------------------------------------------
--------------------------------------------------------
--  DDL for Table COUNTRIES
--------------------------------------------------------
*/
CREATE TABLE `COUNTRIES` (`COUNTRY_ID` CHAR(2), `COUNTRY_NAME` VARCHAR(40), `REGION_ID` NUMERIC(10),  CONSTRAINT `COUNTRY_C_ID_PK` PRIMARY KEY (`COUNTRY_ID`) );
/*--------------------------------------------------------
--  DDL for Table DEPARTMENTS
--------------------------------------------------------
*/
CREATE TABLE `DEPARTMENTS` (`DEPARTMENT_ID` NUMERIC(4,0), `DEPARTMENT_NAME` VARCHAR(30), `MANAGER_ID` NUMERIC(6,0), `LOCATION_ID` NUMERIC(4,0)) ;
/*--------------------------------------------------------
--  DDL for Table EMPLOYEES
--------------------------------------------------------
*/
  CREATE TABLE `EMPLOYEES` (`EMPLOYEE_ID` NUMERIC(6,0), `FIRST_NAME` VARCHAR(20), `LAST_NAME` VARCHAR(25), `EMAIL` VARCHAR(25), `PHONE_NUMBER` VARCHAR(20), `HIRE_DATE` Datetime, `JOB_ID` VARCHAR(10), `SALARY` NUMERIC(8,2), `COMMISSION_PCT` NUMERIC(2,2), `MANAGER_ID` NUMERIC(6,0), `DEPARTMENT_ID` NUMERIC(4,0)) ;
/*--------------------------------------------------------
--  DDL for Table JOBS
... (truncated)
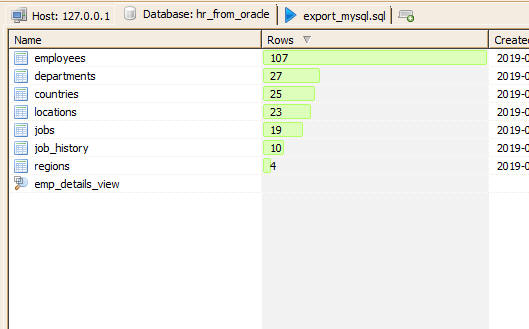
Once the file is modified and compatible with MySQL, create a blank database in MySQL and run the script. Here's the resulting target database:
Pros
Free — it comes bundled with Oracle.
Cons
No direct way to transfer between Oracle and MySQL; requires manual changes to make the output compatible with the target database.