Step-by-Step Guide to Transfer Data from Oracle to MySQL Using MySQL Workbench

By Hassan Shareef, Database Administrator — 16 years of experience


In this guide, we'll show step by step how to transfer data from Oracle to MySQL using the MySQL Workbench tool. MySQL Workbench is a free tool for managing MySQL databases through a graphical interface, and it comes with a Migration Wizard for importing and exporting data. Let's get started.

Prerequisites

Step 1: Install Oracle ODBC Driver

  1. Download the Oracle ODBC driver.
  2. Install the driver — for Oracle Instant Client, extract the package and configure it via the ODBC Data Source Administrator.

Step 2: Configure ODBC Data Source (DSN)

  1. Open the ODBC Data Source Administrator — on Windows, search for "ODBC Data Sources" in the Start menu; on macOS/Linux, use the iodbc or unixODBC utilities.
  2. Create a System DSN for Oracle: go to the System DSN tab and click Add.
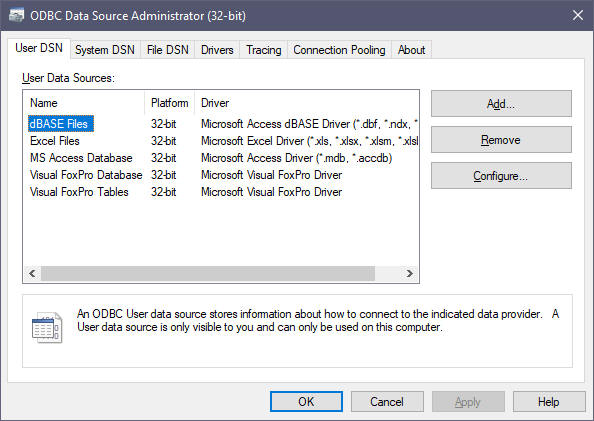
    ODBC administrator

  3. Select the installed Oracle ODBC driver, then configure the connection: Data Source Name (a custom name, e.g. Oracle_DSN), Host/IP (Oracle server address), Port (1521 default), Service Name/SID, and Username/Password.
  4. Test the connection and save the DSN.
Step 3: Set Up MySQL Workbench for ODBC Migration

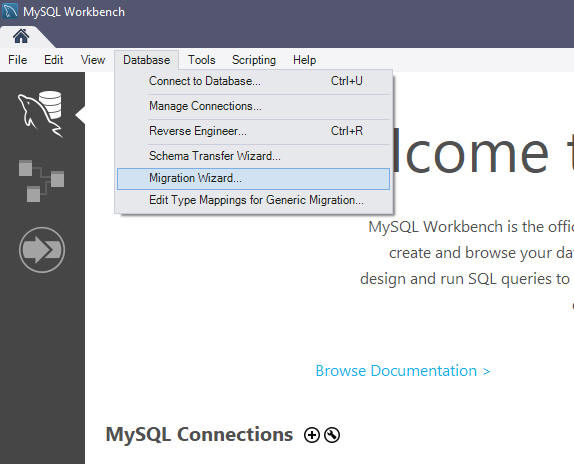
  1. Open MySQL Workbench and navigate to Database > Migration Wizard.

    MySQL Workbench migration wizard

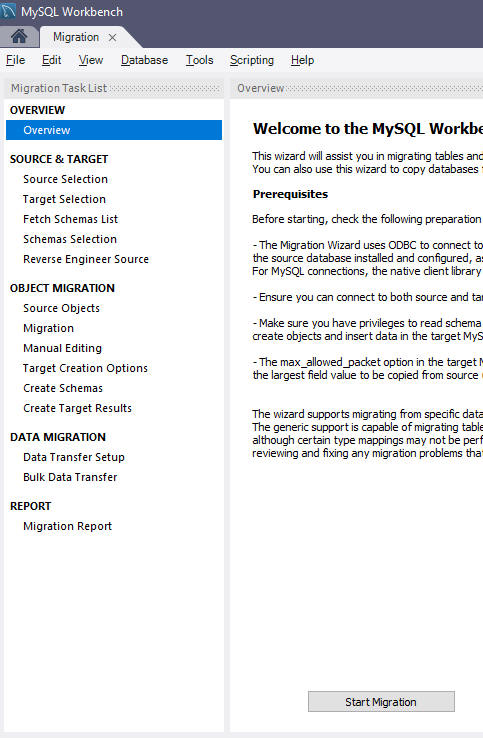
  2. Source Database: click Start Migration, select ODBC as the source type, and enter the DSN name (Oracle_DSN) and Oracle credentials.

    Start migration wizard

  3. Target Database: configure the MySQL connection details (host, port, username, password).
  4. Test both connections before proceeding.

Step 4: Schema Conversion

Fetch Source Schema: select the Oracle schema(s) to migrate — for this guide we'll use the sample HR demo schema. MySQL Workbench auto-converts Oracle objects to MySQL syntax, though adjustments may be needed:

Manual Adjustments: modify indexes, triggers, or constraints as needed, and handle unsupported features like Oracle-specific functions.

Step 5: Data Migration

  1. Select Tables: choose tables to migrate, using filters to exclude unnecessary data.
  2. Data Mapping: map Oracle columns to MySQL columns, adjusting data types as needed. For large datasets, enable batch processing (e.g. 10,000 rows per batch).
  3. Import Modes: Append adds new records, Replace overwrites existing data, and Truncate Table clears the table before a fresh load.
  4. Start the migration and monitor logs for errors.

Step 6: Verify Data Integrity

  1. Compare row counts between Oracle and MySQL:
    -- Oracle
    SELECT COUNT(*) FROM employees;
    -- MySQL
    SELECT COUNT(*) FROM employees;
  2. Validate data consistency for critical fields (dates, unique IDs, etc.).
  3. Use automated data comparison tools where available.

Tips

  1. ODBC vs. JDBC: ODBC is more resource-efficient and supports cross-platform compatibility.
  2. Architecture Mismatch: ensure the ODBC driver and application (e.g. MySQL Workbench) are both 32-bit or 64-bit.
  3. Performance: disable foreign key checks during migration:
    SET FOREIGN_KEY_CHECKS = 0;
    -- Run migration
    SET FOREIGN_KEY_CHECKS = 1;
  4. Tools: use Data Loader for a GUI-driven migration with advanced mapping features and automated large-scale transfers — try the Oracle to MySQL Converter.

Troubleshooting